Assignment 3 - Reverse curve tutorial & Reflection
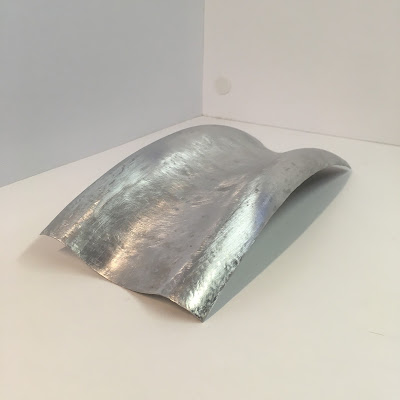
Reverse curve tutorial You will need Sheet metal preferably Aluminum Flat nylon mallet Curved nylon mallet Assorted metal dollies Assorted timber dollies Engineers vice Sandpaper and markers Step 1. Begin by selecting a piece of annealed aluminum and carefully mark lines where you would like the curve to change direction. Step 2. Next find a suitable dolly with the desired curve. Because the annealing process the Aluminum is quite malleable, thus it is possible to simply wrap the material around with minimal force. Step 3. For the next section any mould/dolly that has a dip can be used as long as it can withstand lots of punishment, In this tutorial a round log with a gouge was used. Begin by hammering the piece into the crevice with a rounded nylon mallet, the material will begin to buckle and twist on the edges, but ignore this for now, simply focus on hammering the internal curve. Step 4. You may notice that the m
